Intuition
There are many benefits of creating a personal website or blog, though it takes time to maintain. Once you decide to make one, finding a framework that you feel comfortable with is important. This website is generated by Pelican, a static site generator powered by python. In this post, I will demonstrate step by step on how to make a blog using Pelican. There are other nice frameworks out there, e.g. Jekyll (ruby), Hexo (javascript) and Nikola (python). These frameworks work well on Windows, OSX, and Linux. For those who are interested in Hexo, please check out my friend's post about Hexo with a step-by-step guide.
Ok. Let's get started with Pelican.
Step-by-Step Guide
Prerequisites
I assume you are already comfortable working with python and git. Although it is optional, I recommend the project is built under a virtual environment. Additionally to python and git, which I assume you already installed, you need to install pelican, markdown (as I'm going to use markdown to write contents). I'm going to work on the directory ~/pelican_demo/ for this demo:
mkdir ~/pelican_demo
cd ~/pelican_demo
We next generate a virtual environment and then build necessary libraries within it.
virtualenv env
source env/bin/activate
pip install pelican markdown
You may need to install other tools along the way, but let's keep it basic first. Once above packages are installed successfully, we can move to the next step.
Quick Start
Pelican provides a quick start function, pelican-quickstart, that generates a framework skeleton. I suggest not to create the project in the same directory as where the virtual environment is in; instead, create another directory, e.g. src, for example.
mkdir src
cd src
Once you run the command pelican-quickstart, there is a series of questions popped up, and just answer it one by one. For URL prefix, you can choose n for now. You can leave most of the answers as default (the capitalized one).
$ pelican-quickstart
Welcome to pelican-quickstart v3.6.3.

This script will help you create a new Pelican-based website.

Please answer the following questions so this script can generate the files
needed by Pelican.


> Where do you want to create your new web site? [.]
> What will be the title of this web site? Pelican Demo
> Who will be the author of this web site? PJ
> What will be the default language of this web site? [en]
> Do you want to specify a URL prefix? e.g., http://example.com   (Y/n) n
> Do you want to enable article pagination? (Y/n)
> How many articles per page do you want? [10] 8
> What is your time zone? [Europe/Paris] America/Los_Angeles
> Do you want to generate a Fabfile/Makefile to automate generation and publishing? (Y/n)
> Do you want an auto-reload & simpleHTTP script to assist with theme and site development? (Y/n)
> Do you want to upload your website using FTP? (y/N)
> Do you want to upload your website using SSH? (y/N)
> Do you want to upload your website using Dropbox? (y/N)
> Do you want to upload your website using S3? (y/N)
> Do you want to upload your website using Rackspace Cloud Files? (y/N)
> Do you want to upload your website using GitHub Pages? (y/N)
Done. Your new project is available at /Users/pjhuang/pelican_demo/src
Now you should have the following folder structure in your src directory.
$ tree
.
├── Makefile
├── content
├── develop_server.sh
├── fabfile.py
├── output
├── pelicanconf.py
└── publishconf.py

2 directories, 5 files
Here I will briefly explain these files and folders.
- Makefile, a program building tool (no need to touch it)
- content, the directory that will store all your content, e.g. posts, images, pages and etc. Most of your writing will be stored here.
- develop_server.sh a shell script that boosts your develop server. (again, no need to touch it)
- fabfile.py You can define your own functions in this file to make the deployment process easier by using fabric. For more details please review Fabric doc. The usage of fab is optional.
- output, a directory that contains all your outputs that will be shown in the website, e.g. HTMLs, CSSs, images and etc. The website will only consume the files inside this folder.
- pelicanconf.py a configuration file. You will customize most of your settings in this file. As there are many things you can change, please spend some time to review the setting doc.
- publishconf.py a configuration file that will be used when publishing. By default, this script will import pelicanconf.py, so you can image this file contains some extra settings when the website goes online.
Writing Content
Posts and pages are written in Markdown (.md), reStructuredText (.rst) or HTML (.html). I personally prefer Markdown. Pelican will take your plain text file along with the HTML, CSS and whatever necessary files in the some other locations such as your theme directory (will be discussed later) to compile into HTMLs, outputting files into output directory.
Let's write a dummy post.
New Post
To be more organized we can create a subdirectory to store the post. For example, I create a folder named 2016 to store all the posts written in the year 2016. Open your favourite text editor and type in the following and save it as a markdown (*.md) file in directory src/content/2016/
mkdir content/2016
vim content/2016/my_first_post.md
Title: My First Post
Date: 2016-09-30 23:40
Modified: 2016-09-30 23:40
Category: Pelican
Tags: pelican, publishing, python
Slug: my-first-post
Authors: PJ
Summary:

This is my first post!
The tags above are called metadata. The necessary fields are Title and Date, others are optional but recommended.
New Pages
Writing a new page is pretty much the same as writing a post. The main difference is your page files need to be within a folder named pages under content. For example, we can create a About page like this.
mkdir content/pages
vim content/pages/about.md
Title: About
Date: 2016-09-30 23:45
Modified: 2016-09-30 23:45
Category: Pelican
Tags: pelican, about
Slug: ../about
Authors: PJ

<p> My name is PJ, born and raised in <a href="https://en.wikipedia.org/wiki/Guangzhou">Guangzhou, China</a>.</p>
Now you should have a folder structure like this.
src
├── Makefile
├── content
│   ├── 2016
│   │   └── my_first_post.md
│   └── pages
│       └── about.md
├── develop_server.sh
├── fabfile.py
├── output
├── pelicanconf.py
├── pelicanconf.pyc
└── publishconf.py
Make Files
Now you may want to take a look of the actual website content and layout. You can do that by using the built-in make functions defined in the Makefiles and develop_server.sh. Although you don't have to use all make functions to maintain the blog, there are several handy ones you may use frequently.
- make html - (re)generate the web site
- make clean - remove the generated files
- make devserver - start local server (port 8000 as default)
- make stopserver - stop local server
- make publish - generate using production
First, we need to generate website files, i.e. HTML.
$ make html
pelican /Users/pjhuang/pelican_demo/src/content -o /Users/pjhuang/pelican_demo/src/output -s /Users/pjhuang/pelican_demo/src/pelicanconf.py
Done: Processed 1 article, 0 drafts, 1 page and 0 hidden pages in 0.14 seconds.
Second, we start the local server so we can view it locally.
make devserver
Once the server starts, you can open your browser and type in localhost:8000, and you will see your website.
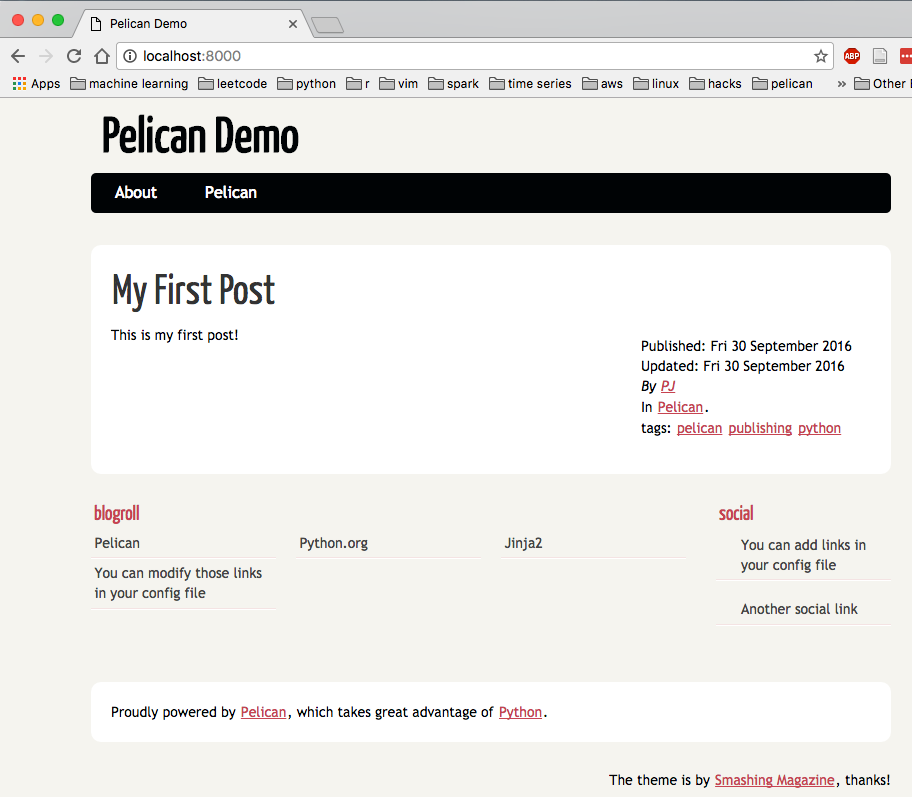
When the local server is running, any changes in content files will be detected and output files will be regenerated automatically. You can refresh the browser to update the website.
Before you publish it (see later section), run this:
make publish
You can stop the server through:
make stopserver
Themes
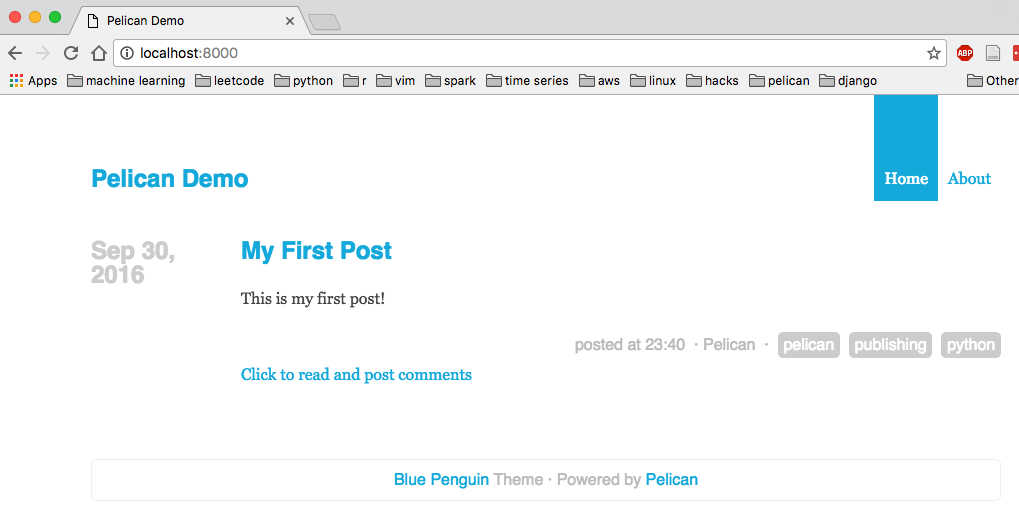
This is cool right? What even cooler for Pelican is that it provides many beautiful themes from its themes repository. You can view a screenshot of all these themes in this site. By just a couple steps, you can change your themes quickly. For example, if you want to use the theme blue-penguin, below is what you need to do:
Clone this theme's repo in your src directory (you can clone it anywhere but you need to change the theme path in pelicanconf.py accordingly).
git clone https://github.com/jody-frankowski/blue-penguin.git
And then change (add if you don't see it) the variable THEME in pelicanconf.py. That's it!
THEME='blue-penguin'
You can create your own theme using Jinja. There is a great document about theme creation in Pelican.
Plugins
Another cool thing about Pelican is it provides a lot of plugins that satisfy most of your needs. Their repo usually have well documented instruction, so here I'm not going to show examples. The steps are similar to those of setting up themes. Again, there is a good documentation about plugin creation if you are interested in.
Deployment
Hosting on Github Pages
Github Pages is one of the best places to host a static website. It is free and provides a 300Mb storage space, which is not bad for a static blog. The deployment process is simple.
- Register a Github account using your customized username, say, statslover.
- Create a new repository with the name as this format, <your_username>.github.io and set it as public. In my example, the repo name will be statslover.github.io.
- Push only your output directory to this repo.
There are several ways to finish step 3.
As only files inside output directory will be used, so one can initiate a git rooted there and push whatever inside to the repo; however, this is not practical at all because the files including your .git/ could be deleted if you run make clean.
Option I
You may create a folder that will sync up your output/ directory. For example, I generated a directory named github_page/ one level above src, and wrote a bash script that makes it synced with output/. My git is in github_page/ and every time before pushing to origin, I sync two folders by running the script. This avoids my git repo being deleted or modified. The command can be something like that:
rsync -avz --delete --exclude '.git/' output/ ../github_page
Just push it to master as you would do in usual after rsync.
cd ~/pelican_demo/github_page
git init
git remote add origin git@github.com:<your_username>/<your_username>.github.io.git
git add .
git commit -m"init commit"
git push -u origin master
Option II
Another way is to use ghp-import. This module will package your output and push to the repo. I don't like this approach as it generates a gh-pages branch that is the site's document root, which means I would have to deal with two branches somehow. Here are the steps:
cd ~/pelican_demo/src
pip install ghp-import

ghp-import output
git push git@github.com:<your_username>/<your_username>.github.io.git gh-pages:master
There are many other ways. The process is good as long as you think it is smooth. Once this is done, your website will be shown in the URL <your_username>.github.io.
Hosting on other servers
If you want to use another server to host the website, you can just simply copy (scp) the files from output/ to the appropriate location of your server. More easily, you can just in that location git clone or pull from your Github repo. Although this requires one more step, but you gain the benefits of using version control.
For example, my current workflow is like writting content locally >> generate output files >> sync folder >> push to Github >> pull repo from Github to AWS. This is a bit inconvenient but the work is minimal, so I'm fine with it.
Ending
Now you should be able to make a static website using Pelican. Hope you think this is helpful. If you have any advice or questions, please leave comments to let me know.
Leave your comments below.